Pureed Pumpkin, I killed the Jack-o-Lanterns!

Ok, so I did something bad...I cooked the kids works of art.
I killed the pumpkins.


AHHH!

I should have taken a picture of the pumpkin post baking. It was scary. But...lets talk about why I killed the pumpkins.

I went to a church activity a while ago that was all about cooking with pumpkins. We tasted some amazing pumpkin soups, pumpkin french toast (really, it was great) and even some delicious pumpkin cheesecake. Cheesecake. I need some. Soon

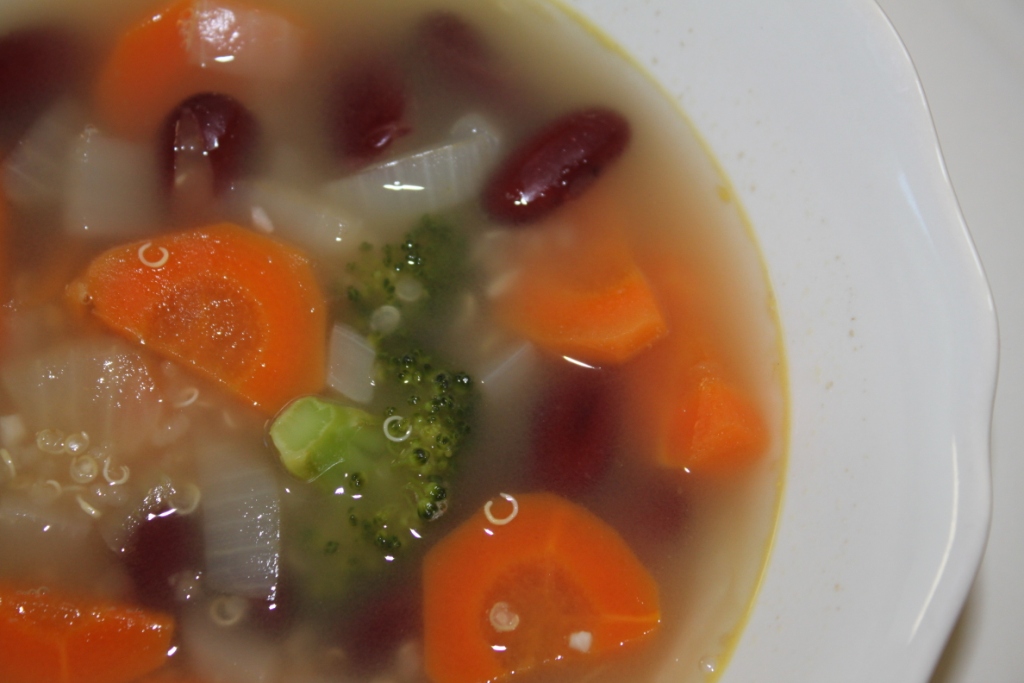
You may be surprised but the cheesecake wasn't the reason that I decided to kill Jack. It was the soup
Oh, Oh, the soup. 
Two different types of soup. Which I will post later when I make them myself from my killer pumpkin. We also learned how to cook pumpkin from pumpkin. Can you believe it? Who buys a pumpkin to cook it? I think we all only buy pumpkins to carve them. I mean really, who cooks them. 

Well, me.

I decided to try it. I made the kids wait until Halloween morning to carve their pumpkins so that they  wouldn't get all wrinkly and gross. As soon as the kids were ready for bed Halloween night I shut off the lights, brought in the jack-o-lanterns, and turned on the oven. 

And now I have about 20 cups of frozen pureed pumpkin in my freezer (I know, it sounds excessive but then I can eat pumpkin soup, pumpkin cheesecake and pumpkin muffins all I want. And it was really cheap).


How to make Puree Pumpkin

1 pumpkin (as large as you want)

Preheat oven to 350 degrees. 

Slice pumpkin in half and scoop out the seeds (or scoop out the seeds and carve a face). Place on a baking sheet flesh side down, with a little water.

Bake for about 90 minutes or until the flesh is tender. 

When the pumpkin has cooled scoop out the flesh


and mash. Though I tossed it in the blender with a little water and mixed it all up. Then I put it into sandwich bags and then about 6 bags into large zip lock bags and tossed them into the freezer. 


I am all ready for soup season!


Seconds Please! A New Favorite: Hearty Quinoa & Bean Soup


I love soup. I know you all know this but I really love soup. Soup is one of the best redeeming things about The Fall. I always love trying new soups and so when I received an email for this recipe from Chatelaine a couple of weeks ago ago and I couldn't wait to try it.

But I had to.

I didn't have a couple of the main ingredients so I finally went shopping and I'm so glad that I did.

This soup was delicious! Aaron wasn't in love with it first but was eating it up by the end. The kids didn't love or hate it so that is a good thing right? And let me just add that when I say its a new favorite, I mean its a new favorite for me.

I'm so glad there are leftovers!

Hearty Quinoa & Bean Soup

1 Tbsp of Vegetable Oil (I used Olive, as usual)
1 chopped Onion
1 diced Carrot
2 cloves of Garlic (or 2 tsp of minced garlic)
1 tsp of Cumin (which I missed somehow...)
1/3 cup of dry Quinoa (I thought 1/3 wasn't enough so I used 1/2 cup. That was too much. stick with 1/3)
1 tsp of Coriander
2 cups of Vegetable Broth (I used Chicken because that is what I had)
2 cups of Water
1 can of White Kidney Beans, drained and rinsed (I used Red because that is what I had as I wanted some more color)
2 cups of Baby Spinach (How did I forget to buy spinach?!?! I used Broccoli and it was still great)

Heat a large saucepan over medium.

Add oil, then onion. Cook until onion is soft, about 3 min.
Add carrot, garlic, cumin, coriander and quinoa.

Cook for 2 more min. Pour in broth and 2 cups water. Bring to a boil, then reduce heat to medium-low. Simmer, partially covered, until quinoa is cooked, about 15 more min.

Stir in beans and spinach (or broccoli). Cook until beans are hot and spinach is wilted, 2 to 3 more min.


Serve immediately with warm whole wheat buns and a nice kale and romaine salad.
  • Prep Tip:

    No need to chop the spinach . Just toss it into the simmering soup and it wilts perfectly.


Chocolate Keeps Me Alive; Even With Black Beans

No, really. I do really live to eat chocolate. I love it. oh, I want some right now just thinking about it. Good thing I have a stash or chocolate chip cookies in my freezer right now. 

I eat a lot of chocolate. Perhaps too much? No, never! But I am aware of my addiction so I thought that I'd try to make my sweet tooth a little healthier by trying out some Black Bean Brownies

I had heard of black bean brownies back in Kingston to a friend who also liked healthy, but delicious food. She had had them at a dinner and tried to make them herself at home. She went for an even healthier route than I did, using Agave Nectar instead of sugar. Ever since she told me about these beaney brownies I've wanted to try them. I finally did.

These are gluten free, fast and easy to make. They didn't turn out gooey and fudgey like gluten brownies but with ice cream, they were fabulous. I served them to some unsuspecting lunch guests and they couldn't tell at all they were gluten free or full of beans. So mix some up today and feel a little bit better when you eat the whole pan while watching the latest chick flick. 


Gluten Free Black Bean Brownies

1 19 oz (540 mL) can black beans, drained and rinsed (I like to cook up a whole whack of black beans and keep them in in my freezer in sandwich size zip-topped bags)
1/2 cup sugar 
2 large eggs
1/3 cup butter, melted
1/4 cup cocoa (Fry's in my favorite brand)
2 tsp. vanilla
1/4 tsp. salt
1/2 cup chocolate chips (I skipped these)
1/3 cup chopped walnuts or pecans (I have some walnuts but skipped them this time)

Preheat oven to 350 degrees.
Place the black beans, sugar, eggs, melted butter, cocoa, vanilla and salt in the bowl of a food processor and blend until smooth, pulsing and scraping down the sides of the bowl to ensure all the beans are completely pureed (I threw these in my blender and turned it on high until it was all mixed up).

If adding the chocolate chips and nuts, do it now. Pour into a greased 8x8 baking pan (or a 8' round cake pan if that is all you can find).

Bake for 25-30 minutes, or until slightly puffed (and this really means slightly puffed) and set. 

Cool before cutting and serve (with ice-cream).

Fall Comfort Food: Pumpkin Anything! Especially Pumpkin and Orange Muffins

I hate the fall. No really. I hate it. Aaron on the other hand loves it. Everything about it. The crisp air, the cozy sweaters and the deep sleep that comes with a cold night.

 I would way rather sweat it out in the summer. 

But I guess there are some good things that come with the autumn. Hot chocolate, my birthday, and soup. And one other thing that I've come to love about cooler days is being able to warm my house up with baking. Soon I will be back to baking bread every week and filling my house with cookies and brownies and treats. 

My kids have been asking to buy a pumpkin for a couple of weeks now.  Honestly, though, I'm not ready to give into autumn decor so I said no and then bought some canned pumpkin. There are tons of things you can make with pumpkin. Tons. In fact, I have a cousin who has had pumpkin potlucks. A bunch of people are invited and everyone has to bring a pumpkin dish. You would be shocked at what kinds of foods come to this potluck.  The year I went I brought a Pumpkin Chili, but there were so many other things.

I considered using my single can of pumpkin for Chili but decided one cool day this past week that I better make something good that I can send in Hazels lunch so I dug around for this recipe and was pleasantly surprised. These muffins were moist, light, and had a unique flavor that we have all come to love.


Pumpkin and Orange Muffins


1 1/2 cups of All Purpose Flour
1 tsp of Baking Powder
1 tsp of Baking Soda
1/2 tsp of Salt
1/2 tsp of Ground Cinnamon (I had no cinnamon so I threw in 2 tsp of All Spice instead of the cinnamon and the next 2 ingredients)
1/2 tsp of Nutmeg
1/2 tsp of Ginger
Raisins (OMITTED. I don't love raisins enough to add these to much of anything)
1 Egg
1/4 cup of White Sugar
1/3 cup of Cooking Oil
1 cup of Canned Pumpkin (I just threw in the whole can)
1/2 cup of Milk
1 1/2 Tbsp of Grated Orange Peel (my house smelled so good after grated this all up)

Combine all the ingredients in a large bowl. Stir until just moistened. Pour into greased muffin tin (or silicone liners) and bake at 400 degrees for 18 or until toothpick comes out clean. 

Cool and enjoy! Like I said before, these have a different flavor but they are so so good! And pretty too!

Happy October! 


Click Here


Quinoa and Grilled Veggies; It may be fall but my BBQ is still getting well used!

Lets talk about trying something new. Well, maybe this isn't something new but lets chat anyway.

Quinoa (pronounced keen-wa) is a grain-like (not grain) crop that is delicious. So good. Its nutty and almost pops in your mouth. Its a great food to add to your diet because it contains things like iron, calcium and protein.   It is super easy to make (rice cooker anyone?), can be used in place of pasta. rice. or couscous, and I think it looks pretty

Now, I don't want you to be confused with couscous (speaking of). I like couscous but it is a completely different crop. Couscous derives from wheat and doesn't require the same cooking as quinoa. It is still considered a delicious and very healthy grain. It is full of good stuff that again we all need to eat. But...I just can't make myself eat it very often. 

Its not that I don't like, its just that when Aaron and I went to France for a summer so he could take some courses and I could have a 6 week French coast beach vacation (that trip was amazing) the university served a cheap meal everyday for lunch in the cafeteria. Because I had taken 6 weeks off work and Aaron was a student being cheap was our life so I met him everyday for lunch at the school. Every day they served couscous and I could never stomach it. Turns out I was a few weeks pregnant with Hazel and maybe I should have been eating the couscous rather than the fresh shellfish and soft cheeses I lived on that summer but there was something about the couscous that my baby making belly couldn't handle. And inst it funny that now 5+ years later I still associate couscous to that sick feeling I had when I walked into that little french cafeteria. 

The Kid who ruined couscous for me. Sweet trampoline hair hey?

So, though couscous is healthy and good and you should eat it I'm not going it. 

But I will eat quinoa forever more. 

Quinoa and Grilled Veggies

1 cup of Quinoa (Costco has one of the best prices for this not cheap grain, better usually than bulk barn even)
2 cups of water or broth (I like to cook mine in broth because it adds some flavour)

Now, since this is my blog I get to tell you how I make it but if you don't have a rice cooker you make this on the stove top the same way as you would rice, or just follow the directions on the packaging. 
So, I put my quinoa and my broth (or water) into my rice cooker (don't have one? you should get one) and turn it on. When it turns itself off telling me that its ready I stir or fluff it up and its ready to go. 

Easy.

Now for the grilled veggies. I made these the same way as when I posted the recipe for Smoky Peppers on the BBQ but I added some zucchini.

3 Peppers cut in half with stems and seeds removed. (Get colorful! I used Red, Yellow and Orange Peppers)
2 Zucchini cut in half.

Brush the veggies with Olive Oil and sprinkle with salt (Salt is a must to help the peppers get juicy!)
Place on a hot BBQ for approx 8 minutes on each side or until tender. 

Once the veggies are cooked (and you can really use any veggies you want) cut into bite sized pieces and mix into your quinoa. I like to add a few shakes of Mrs. Dash and voila, you are ready to eat. 

This dish can be served as a side or even part of a main course. 
Click Here

oh, and we ate all of it before I could take any pictures so how about one of my cute family?

Family wrestling on the tramp


Getting Ready for Fall: Crock pot Chilli and Baked Pita Chips


I'm in mourning. I've come to a sad realization over the past couple of days and it makes me so sad. And yes, I'm perhaps being a little melodramatic, but, still...

The thing I've realized is that my cooking habits have got to change. I love our new city but I spend my entire day driving. Well, maybe not the entire day but a lot of it. And the reason that I have to change my cooking habits is because I have to get Hazel off the bus then I have 40 minutes to make dinner and get to the college to pick Aaron up. We then come home and everyone is starving (and if you have seen someone related to Aaron hungry you will know it is scary) and we need to eat pronto.

This means I won't be able to try 3-4 new recipes a week. This means I cant spend a late afternoon in my fabulous new kitchen chopping veggies or sautéing tofu. This means I have to start making crock pot meals, having freezer meals ready, and have lots of quick solutions pretty much everyday.

Now, I want you to know that I love freezer meals but I also love the chopping, and cooking, and seeing it all come together, not just throwing it in a casserole dish and walking away for a few hours.

So, here is the first of the hopefully lots of quick and easy meals to help me get through this year (if we last that long living with only 1 car). This meal was something I threw together with things I had, including the chips.

This meal was delicious, hearty and everyone bowls were empty at the end of dinner.


Vegetarian Crockpot Chilli and Baked Pita Chips

1/2 a chopped Onion
2 tsp of minced Garlic
1 can of Diced Tomatoes (but, I didn't have any so I just chopped 3 fresh tomatoes and threw them in)
2 chopped Zucchinis (I love squash season)
1 can of Chick Peas
1 can of Black Beans
4 tbsp of Tomato Paste (but I didn't have any so I just threw in a can of tomato soup)
1/2 a cup of Salsa
1/2 tsp of Salt
1 tsp of Curry Powder
2 tsp of Basil
2 tsp of Thyme

So...since this is a crock pot meal you really just throw everything in the crock pot, turn it on. High for 3-4 hours or Low for 6-8. Serve hot with buns, or tortilla chips or a favorite around here, Baked Pita Chips.


Baked Pita Chips


This is a super easy and fast 'recipe'. We eat a lot of wraps but sometimes we don't eat them fast enough and they get a little dry and then they don't wrap properly. When I get like this I turn them into chips to eat with hummus, or salsa or chilli.

Cut your wraps into triangles. Arrange on a baking sheet (I always put parchment paper down first) and bake at 350 for about 8 minutes. Turn them over and bake for an additional 6 minutes or until they are golden brown. Serve.

I have never seasoned these but I'm sure you could brush them with Olive Oil and sprinkle sea salt on them for a little splash of flavour.


Greek Food, Belly Dancers and Pizza

I used to spend a lot of time in a Greek restaurant. I had a good friend Chuck who's step dad owned a Greek restaurant in the community I grew up in . We used to go and eat, break plates, and sometimes some of us would get hit on by the belly dancers who worked there. Such fabulous fun times. It was during those times that I fell in love with Greek food. I want tzatziki just thinking about that. 

Anyway, lets get to the pizza part. I love pizza. I could eat pizza every week. I'm usually a pepperoni and mushroom kind of girl but when I was making pizza the other night I suddenly had a craving for Greek so I put it all together, and satisfied my need for feta.


Greek Pizza

Crust: 
Simple Scratch Pizza Dough

Mix: 
1/2 cup of Warm Water
1/2 tsp of Sugar
3 tsp of Instant Yeast

Add:
1 cup of Hot Water
1 Tbsp of Vegetable Oil
1 tsp of Salt
Flour; enough to make a soft dough (about 3 1/2 cups) (I used whole wheat to give this pizza a healthy boost)

That is it, knead this all together and voila! you are ready to roll it out

Now time to add some Greek toppings:

I substituted tomato pizza sauce for tzatziki, threw on some tomato, onion, green pepper and feta. The only thing I was missing was spinach but even without the green stuff  this pizza turned out so good.   

 Okay, so bake at 375 for 25-30 minutes or until golden brown and cooked through and then eat up!

*To make thick chewy crust: stretch dough to 1/2" thickness and let it rise slightly before baking.
*To make a thin, crisp crust: use cold dough, roll it to 1/4" and bake while the dough is still cold.


Mango & Sweet Pepper Sauce (use on everything)

I live with a little bit of a foodie. Not crazy but he does like food and especially likes trying new foods which is good for me because I love trying new recipes. We do have our favorites (and this is now one of them) which I fall back on often but I like to pull out a new recipe at least once or twice a week. 

Some recipes are a total flop. Awful. Toss in the garbage and order pizza kind of bad. Not often though I'm happy to report. Usually they are pretty good, and sometimes perfect

This is one of those perfect recipes. I like it most because it has kept Aaron guessing every time I have used it (3x this week). I also like it because it is so versatile. It is meant as a grilling sauce for any type of meat but we have been eating it on all sorts of things and in all sorts of ways; on grilled meats, tofu, rice, and in wraps. Also, it was so easy to prepare and I love being able to make something like this from scratch since I know exactly what is in it (yup, I'm a little controlling about my food) He likes it because of the blend of flavours. He still doesn't know what is in it which is also fun for me because it is driving him a little bonkers. Maybe he will read this and learn something new. 


Mango & Sweet Pepper Sauce

1 ripe mango
1/2 of a small onion
1 sweet red pepper (I only had orange so my sauce is super orange and bright and fun!)
1 Tbsp of oil (I use olive)
2 Tbsp of white vinegar
Pinch of Salt

First, cut the mango into two long flat halves around the stone inside. Pull the two halves apart and discard the stone. Scoop out the flesh with a spoon and place into a blender (or...peel your mango then cut the flesh off on the stone and toss it in the blender. It really doesn't matter how you do it just get that mango in the blender)

Chop the onion and sweet red (or orange) pepper, and sautĂ© over medium heat in your oil. SautĂ© until the onions and peppers are soft, about ten minutes.

Add these sautĂ©ed onions and peppers to the blender with the mango flesh and add your 2 Tbsp of vinegar.
PurĂ©e the mixture until smooth.

Add  salt and taste. You want the sauce to be sweet and tart and savory, without being noticeably salty. If you think it is a little bland, add another pinch of salt, and if you think it is too sweet, add a little more vinegar.(I didn't have to add anything else after it was blended together) Most mangoes are sweet enough already, but if your sauce tastes too sour, you can mix in a little sugar to sweeten it up. . Serve anywhere.


Remember, you can use this sauce for anything. It is so delicious and the mix of sweet and savoury is 
perfectly matched. I'd love to hear if this sauce is a hit at your house too! Happy cooking!


Happy Birthday: Gluten Free Cake

I love birthdays. And weddings. And really anything that will allow me to have or attend a party and eat delicious food and more importantly; dessert.

This past weekend we all headed to Calgary to celebrate my sister-in-laws birthday. This made me so happy because:

#1: it was just family and I'm still revelling in all of our family being so close


#2: my kids are the only kids (for a few more months) that were there so they get lots of love and kisses and attention from everyone but me (which means I get to actually sit back and enjoy myself)

#3: we only had to drive 1.5 hours to attend instead of having to drive 1.5 hours, fly 4 then drive another 30 minutes to get there.

Being home is so great.

But anyway, back to the party. It was a lot of fun and because though it was a party for a beautiful and successful and mature adult it was still filled with fun treats (aka homemade chocolates), fancy drinks (punch with puree'd fruit), and lots of pink (lots).

I wanted to do something special for the birthday girl so I offered to make her cake. Now, I'm no cake decorator; I spent hours trying to figure out which icing recipe to use, but this birthday girl eats Gluten-Free so I thought tackling a GF birthday cake would be a nice little treat for her since everyone is still sort of adjusting to her diet.

Making the cake was easy.

Decorating the cake was easy (surprise!).

But finding all of the ingredients in a new city without my favourite store near by (Bulk Barn where are you???) was a bit tricky.

I had to premix my own gluten free flour (though I could have bought pre-mixed I was going for the true 'baked from scratch' approach). Then add all of the other ingredients like a usual cake.
It turned out awesome. It wasn't too heavy, not too dry and overall great.

I got some great response from the birthday girl, another gluten-free party goer, and everyone else. The cake was a hit.

So, though this recipe was tricky for me to find the ingredients I blame that on me not knowing my new city well enough and the lack of my favourite store. No big deal. Once you have what you need this cake is fast and easy to make and I'd be happy to make another one next year.

Happy Birthday Toot.


Gluten Free Birthday Cake

Flour Mix

(I'm assuming you can use this flour mix in any recipe...I'm going to try to use it to make some muffins, I will let you know if it works)

1 cup corn starch

½ cup brown rice flour

½ cup white rice flour

1 cup potato starch

½ cup corn flour

½ cup tapioca starch

4 tsp xantham gum (I used Guam Gum since it was so much cheaper. So much)

Recipe

2 cups of above mix

4 eggs

1 tsp baking powder

1 tsp baking soda

½ tsp salt

1 cup butter

1 ¾ cups sugar

2 tsp vanilla

1 1/3 cups milk


Preheat oven to 350. In medium bowl combine flour, baking powder, baking soda, salt and set aside. In large bowl cream sugar and butter on medium high speed with mixer until light and fluffy. Reduce speed to low and add vanilla and eggs one at a time. Add flour and milk. Mix until smooth. Pour into cake pans and cook until bakes through.


Smoky Peppers on the BBQ


I love peppers. They are so delicious and crunchy and good. So good. And this recipe made them taste AMAZING.
My brother and his fiancée came to stay one night last week and we had a blast. We drove them around and showed them our new city and where Aaron works, played some intense Cranium and ate an awesome meal (yup, I'm talking about the one I prepared).
It was so fun for us to have our first visitors come and stay and I had been wanting to try this recipe out so I thought that it would be appropriate to make it for them. They loved it. Or they said they did. Either way Aaron and I loved it and it was even so good the next day as left overs.
The only problem? I forgot to take any pictures. I know, I know but at least I'm starting to get back on the blogging and eating real food wagon.
This recipe was fast, easy and good. A perfect side to any dish or good on lots of things - rice, pasta, tofu (we may have eaten in on chicken).
So although I am photo challenged try this recipe because I said so.

Smoky Peppers

  • 3 peppers, preferably 1 red, 1 yellow & 1 orange (pretty)
  • 3 tbsp (45 mL) olive oil
  • 2 tbsp (30 mL) red-wine vinegar (I didn't have this so I just skipped it. It wasn't missed)
  • 1 tbsp (15 mL) honey or granulated sugar (I used a squirt of Honey Dijon mustard)
  • 2 garlic cloves, minced
  • 2 plum tomatoes
Turn on your bbq to medium. While it is heating up slice your peppers in half and core. Lightly brush with olive oil and sprinkle with salt. (make sure you don't skip the salt, it is what makes the peppers so flavourful and juicy)

Place peppers on the bbq and close lid. Let the peppers cook for approx 6 min. on each side.

While your peppers are cooking find a large bowl and whisk 3 Tbsp of olive oil with vinegar (If you have it), honey, garlic and 1 tsp of thyme. Coarsely chop your tomatoes and stir in.

When your peppers are done, coarsly chop and add to the above. Serve as a side or over anything you want!
YUM!